(Disclosure, I may receive a small referral fee when you make a purchase through links on this post.)
Are you feeling more disconnected from your Chromecast than a teenage girl from her mom during a phone call? Is the buffering wheel spinning more than a DJ at a wedding reception? Fear not, my technologically challenged friends, for we are here to help you troubleshoot those pesky Chromecast connection problems and get you back to binge-watching your favorite shows faster than you can say “reboot and repeat”. So grab a snack, prop up your feet, and let’s dive into the world of Chromecast connection conundrums with a sense of humor and a touch of tech-savvy know-how. It’s time to cast away those connectivity woes and get back to streaming in style!
Common Chromecast Connection Issues
So, you’re trying to cast your favorite show from your phone to your TV, but you’re hitting some roadblocks. Don’t worry, we’ve all been there. Here are some that might be standing in your way:
- Wi-Fi Woes: Make sure your Chromecast and phone are on the same Wi-Fi network. If not, they’re like ships passing in the night – never to connect.
- Power Problems: Sometimes a simple power cycle is all it takes to get things back on track. Unplug your Chromecast, count to ten (or twenty if you’re feeling ambitious), and plug it back in.
- App Annoyances: If the app you’re using to cast is acting up, try force quitting it and reopening. Just like a stubborn child, sometimes it just needs a little nudge in the right direction.
Remember, troubleshooting can be a pain, but when you finally hit that sweet spot and see your show start playing on the big screen, it’s all worth it. So, stay patient and keep trying – you’ll get there eventually!

Checking Network Connection
So you’re trying to connect to the internet, but all you’re getting is the spinning wheel of doom? Fear not, for we are here to help you troubleshoot your network connection! Let’s dive into some ways you can check to see what’s causing your internet woes.
First things first, let’s make sure your Wi-Fi is actually turned on. It may sound silly, but you’d be surprised how often this simple step gets overlooked. Check your device settings to ensure that your Wi-Fi is enabled – nobody likes a sneaky airplane mode setting!
If your Wi-Fi is on but you’re still not connecting, it’s time to investigate further. Try restarting your router – sometimes all it takes is a good old-fashioned power cycle to get things back on track. Make sure all the cables are securely plugged in and give that router a good smack for good measure (just kidding, please don’t actually do that).
Another thing to check is whether your device is actually connected to the correct network. It’s easy to accidentally hop onto a neighbor’s Wi-Fi instead of your own. Make sure you’re connected to the right network with a strong signal – unless you enjoy borrowing internet from the Joneses!

Ensuring Chromecast is properly powered
First things first, make sure your Chromecast has enough juice to work its magic. Don’t be like those folks who forget to charge their phones before heading out for the day – we all know how that ends!
Here are a few tips to ensure your Chromecast is properly powered:
- Use the power adapter that came with your Chromecast – don’t try to get fancy with adapters from other devices. Your Chromecast knows what it needs!
- Plug the power adapter into a wall outlet – not a power strip or extension cord. Your Chromecast deserves a direct line to power, just like a VIP at a fancy party.
- Check the power cord for any signs of wear or damage. We all know cords can get a little frayed after a while – make sure yours is in tip-top shape!
So there you have it, folks. Follow these tips to make sure your Chromecast is always ready to stream your favorite shows and movies with no interruptions. Because let’s be real, there’s nothing worse than being in the middle of a nail-biting scene only to have your Chromecast cut out on you. Trust us, your future self will thank you!

Verifying HDMI Connection
So you finally got that brand new state-of-the-art TV with all the bells and whistles, only to realize you have no idea how to set it up. Fear not, my fellow technophobes! Let’s tackle the beast that is HDMI connectivity together. Here are a few steps to ensure your HDMI connection is verified and good to go:
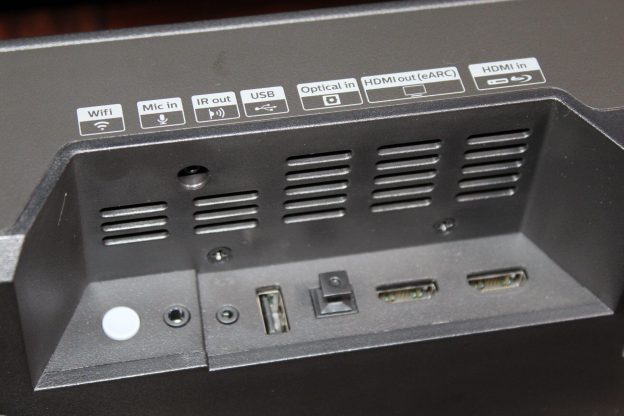
First things first, make sure you have the right cable and ports. HDMI cables come in all shapes and sizes, so double-check that you’re using the correct one for your TV and device. Look for the HDMI ports on both your TV and device – they’re usually labeled, but if all else fails, just start plugging and praying.
Next, it’s time to power up and get connected. Turn on both your TV and device, grab your remote, and navigate to the input setting. Scroll through until you find the HDMI input you connected your device to. If all goes well, you should see that beautiful signal pop up on your screen in no time. Huzzah!
If you’re still staring at a blank screen and contemplating throwing your remote out the window, fear not. Take a deep breath, double-check your connections, and try a different HDMI port if needed. Sometimes these finicky little cables just need a little love and patience to do their job. And remember, when all else fails, there’s always the trusty ol’ “unplug it and pray” method. Good luck!

Updating Software and Firmware
So, you’ve finally decided it’s time to update your software and firmware. Congratulations on taking that brave step into the world of technology maintenance! Now, let’s dive into the exciting world of updating and upgrading. Trust me, it’s going to be a wild ride.
First things first, make sure you have a reliable internet connection. You don’t want to be stuck in software update purgatory because your Wi-Fi decided to take a lunch break. Once you have that sorted, it’s time to hit that update button. Go on, give it a little tap. Feel the power!
As the progress bar inching its way across the screen, you might be tempted to go make yourself a cup of coffee. But don’t be fooled by its slow pace – this is where the magic happens. Your device is getting a makeover, a facelift if you will. So sit back, relax, and enjoy the show.
Once the update is complete, take a moment to bask in the glory of your newly updated software and firmware. Your device is now as good as new, ready to take on the world. Who knew technology maintenance could be so satisfying? Now go forth, brave soul, and conquer the digital realm!
Resetting Chromecast to Factory Settings
So you’ve decided to give your Chromecast a fresh start, eh? Well, my friend, you’re in for quite the ride. Resetting your Chromecast to factory settings is like hitting the reset button on your life - it’s liberating, it’s exhilarating, and it’s a bit scary.
First things first, grab your trusty Chromecast and hold down that tiny button on the back for at least 25 seconds. It’s like giving your Chromecast a little massage, but instead of easing tension, you’re wiping out all its memories. It’s like that one time you tried to erase your embarrassing high school photos, but ten times more dramatic.
Once you see that blinking light on your Chromecast, you’ll know it’s time to set it free. Say your goodbyes, thank it for its service, and get ready to start anew. You’ll have to go through the whole setup process again, but hey, nothing worthwhile comes easy, right?
So there you have it, resetting your Chromecast to factory settings is like hitting the reset button on life. It’s a fresh start, a clean slate, a chance to make new memories. So go ahead, give it a try and see where the Chromecast gods take you.
FAQs
Why won’t my Chromecast connect to my Wi-Fi?
Well, it’s possible your Chromecast is just having commitment issues with your Wi-Fi. Try restarting your router, making sure your Chromecast is within range, and double-checking the Wi-Fi password. If all else fails, consider couples counseling for your devices.
How do I troubleshoot a frozen Chromecast?
If your Chromecast is freezing up, give it a pep talk. Unplug it, wait a few seconds, and plug it back in. It just needs a little break to collect its thoughts and get back to streaming your favorite show.
What should I do if my Chromecast is not showing up on my TV?
If your Chromecast is feeling camera shy and not showing up on your TV, try changing the input to the correct HDMI port. Sometimes all your Chromecast needs is a little reminder that it’s the star of the show.
My Chromecast is experiencing buffering issues, what can I do?
Buffering issues? Sounds like your Chromecast might need a snack. Check your internet speed, close any other apps or devices hogging bandwidth, and maybe even give your Chromecast a little pat on the back for working so hard to keep up with your streaming demands.
How can I fix audio or video lag on my Chromecast?
If your Chromecast’s audio or video is lagging behind, try resetting your router, making sure your Chromecast is up to date, and keeping it away from any interference. And remember, patience is a virtue – your Chromecast is doing its best!
Until next time, happy casting!
Now that you’re armed with the knowledge to troubleshoot your Chromecast connection problems, you can get back to binge-watching your favorite shows without any interruptions. Remember, when in doubt, just unplug it and plug it back in – it’s the ultimate tech solution.
So go forth and cast away, my friends! And may your streaming always be strong and your connections never falter. Until next time, happy casting!


