(Disclosure, I may receive a small referral fee when you make a purchase through links on this post.)
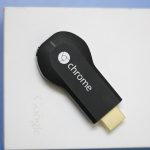
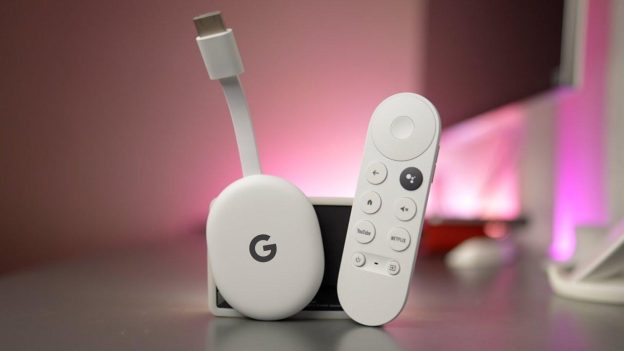
Welcome to the wonderful world of Chromecast HDMI settings, where the possibilities are as endless as your binge-watching sessions. Whether you’re a tech-savvy guru or just someone who wants to maximize their streaming experience, there’s plenty of tips and tricks to help you get the most out of your device. So sit back, relax, and get ready to unleash the full potential of your Chromecast - with a sprinkle of humor and a dash of entertainment along the way. Let’s dive into the ultimate guide to maximizing performance with your Chromecast HDMI settings!
Choosing the Right Display Resolution for Your Chromecast Device
So, you’ve got your shiny new Chromecast device and you’re ready to start streaming all your favorite shows and movies. But wait – what display resolution should you choose to get the best viewing experience? Don’t worry, we’ve got you covered!
First things first, let’s talk about the options:
- 1080p – This is your standard high definition resolution. Perfect for most viewing experiences, it’s sharp, clear, and will make you feel like you’re right in the action.
- 4K – Ahh, the holy grail of resolutions. If you want to feel like you’re seeing every single pixel on the screen, this is the one for you. Just be warned – you might never want to go back to regular HD again!
Now, how to choose?
- If you’ve got a snazzy 4K TV: Go for the 4K resolution, of course! You didn’t invest in that beautiful TV for nothing, so why not take full advantage of its capabilities?
- If you’re rocking a trusty old 1080p TV: Stick with what you know and love. Your TV will thank you for not pushing it to its limits, and you’ll still get a great viewing experience.
Adjusting HDMI CEC Settings for Seamless Integration with Other Devices
Are you tired of your HDMI CEC settings causing chaos in your living room? Don’t worry, we’ve got you covered with some tips on how to adjust them for seamless integration with all your other devices. Say goodbye to random volume changes and unexpected input switches!
First things first, locate the CEC settings on your TV or device. It might be hidden in a maze of menus, but once you find it, you’ll be on your way to a more harmonious entertainment experience. Trust us, it’s worth the effort!
Next, disable any unnecessary CEC functions that are causing issues. Do you really need your TV to turn on every time you switch on your gaming console? Probably not. Keep only the essentials enabled to avoid any unwanted surprises. It’s like decluttering your living room, but in digital form!
Lastly, test out your new settings and make sure everything is working smoothly. Run through different scenarios, like switching between devices or adjusting volume, to ensure that your HDMI CEC settings are now playing nice with all your gadgets. Congratulations, you’re now a master of CEC integration!

Configuring Audio Preferences for Optimal Sound Quality
So you’ve got your audio preferences set up, but are you really getting the optimal sound quality? Let’s fine-tune those settings to make your ears sing with joy!
First things first, make sure your audio drivers are up to date. Nothing ruins a good jam session faster than outdated drivers. Update those bad boys pronto!
Next, **adjust your EQ settings**. Play around with those sliders until you find the perfect balance of highs, mids, and lows. You want your bass to thump, your vocals to shine, and your treble to sparkle like a unicorn’s horn.
And finally, don’t forget about **speaker positioning**. Make sure those bad boys are facing your ears and are at ear level. You don’t want your music bouncing off the walls and getting lost in the void. Let that sound wave hit you right in the feels!

Enhancing Video Playback with Advanced HDMI Settings
So you’ve got a brand new TV and you’re ready to take your video watching experience to the next level. But did you know that with a few tweaks to your HDMI settings, you can enhance your video playback even more? It’s time to unleash the full potential of your TV!
First things first, make sure you’ve got the latest HDMI cable hooked up to your TV. A high-speed HDMI cable is essential for getting the best picture and sound quality. Trust us, you don’t want to miss out on those crystal-clear images and booming sound effects.
Now, let’s dive into the advanced HDMI settings. Don’t be intimidated by all the technical jargon – we’re here to break it down for you in plain English. Adjusting these settings will make a world of difference in your viewing experience. Take your video playback from good to AMAZING with just a few simple tweaks.
Ready to become a video playback wizard? Here are some advanced HDMI settings you can play around with:
- Color Space: Experiment with different color spaces to find the one that gives you the most vibrant and true-to-life colors.
- Resolution: Make sure you’re watching content in the highest resolution possible for crisp, clear images.
- Refresh Rate: Adjust the refresh rate to eliminate motion blur and stuttering in fast-paced scenes.
Optimizing Network Connection Settings for Smooth Streaming
So you want to make sure your streaming experience is as smooth as a freshly buttered slide? Well, you’ve come to the right place. Let’s dive into some network connection settings that will have your videos streaming faster than a cheetah on roller skates.
First things first, check your internet speed. If your connection is slower than a snail heading to a tea party, it’s time to call your internet provider and demand some turbo-charged service. Ain’t nobody got time for buffering.
Next up, make sure your Wi-Fi signal is strong. Weak signals are about as useful as a chocolate teapot when it comes to streaming. Position your router like it’s the star of a photoshoot and watch those bars light up like a disco ball.
Lastly, don’t forget about those pesky background apps sucking up your bandwidth like a vacuum on a mission. Close ’em down faster than a haunted house at midnight and watch your streaming speeds soar to new heights.
Customizing Picture Mode and Display Settings for an Enhanced Viewing Experience
Have you ever looked at your TV screen and thought, “This could be so much better”? Well, fear not, because with just a few tweaks to your picture mode and display settings, you can take your viewing experience to a whole new level!
First things first, let’s talk picture mode. Most TVs come with a few preset picture modes like Standard, Vivid, or Cinema. But why settle for the status quo when you can create your own custom picture mode? Play around with settings like brightness, contrast, and color temperature to find the perfect balance for your eyes. Trust me, **you’ll never look back**.
Next up, display settings. No one likes squinting at a dimly-lit screen or being blinded by overly bright whites. Adjust your backlight and contrast settings to find the sweet spot for your viewing environment. And don’t forget to turn off any unnecessary post-processing effects like motion smoothing – nobody wants to watch their favorite show in Soap Opera Mode!
So there you have it – a few simple tweaks and your TV will be transformed into a personalized viewing paradise. **Sit back, relax, and enjoy the show**!
FAQs
Can I adjust the video resolution on my Chromecast?
Yes, you can adjust the video resolution on your Chromecast by going into the settings menu on the Google Home app. Make sure to select the best resolution that corresponds to your TV for the ultimate viewing experience.
What is the best HDMI port to use for my Chromecast?
The best HDMI port to use for your Chromecast is usually the one labeled as “HDMI 1”. However, if you’re feeling adventurous, feel free to try out the other HDMI ports on your TV to see if there’s any noticeable difference in performance.
How can I improve the Wi-Fi connection for my Chromecast?
To improve the Wi-Fi connection for your Chromecast, try moving your router closer to your TV or investing in a Wi-Fi extender. You can also try changing the Wi-Fi channel on your router to minimize interference and maximize performance.
Is there a way to reduce buffering and improve streaming speed on my Chromecast?
To reduce buffering and improve streaming speed on your Chromecast, try closing any background apps on your casting device and making sure that your internet connection is strong and stable. You can also consider upgrading to a faster internet plan for smoother streaming.
Can I customize the audio settings on my Chromecast?
Yes, you can customize the audio settings on your Chromecast by adjusting the sound output and volume levels on the Google Home app. Feel free to play around with the audio settings to find the perfect balance for your listening pleasure.
Until Next Time, Happy Streaming!
Thanks for taking the time to dive into the world of Chromecast HDMI settings with us! We hope you’ve learned some tips and tricks to truly maximize your streaming performance.
Remember, pixelated video is so last season, so make sure to tweak those settings and enjoy crystal-clear picture quality on your favorite shows and movies. Happy streaming, and may your binge-watching sessions be interruption-free!
And who knows, maybe one day you’ll look back on this article and laugh at how simple it all seems. But until then, keep tweaking those settings and keep on streaming!